Creating Custom Containers for Communities
Step 1: Log into your SciCrunch Account and access your community page

Step 2: Under the “My Account” tab enter the “Manage Community” page.

Step 3: Under the “Manage Community” page, select the “Content” tab.

Step 4: Under the “Content” tab, select “Add New Container”.

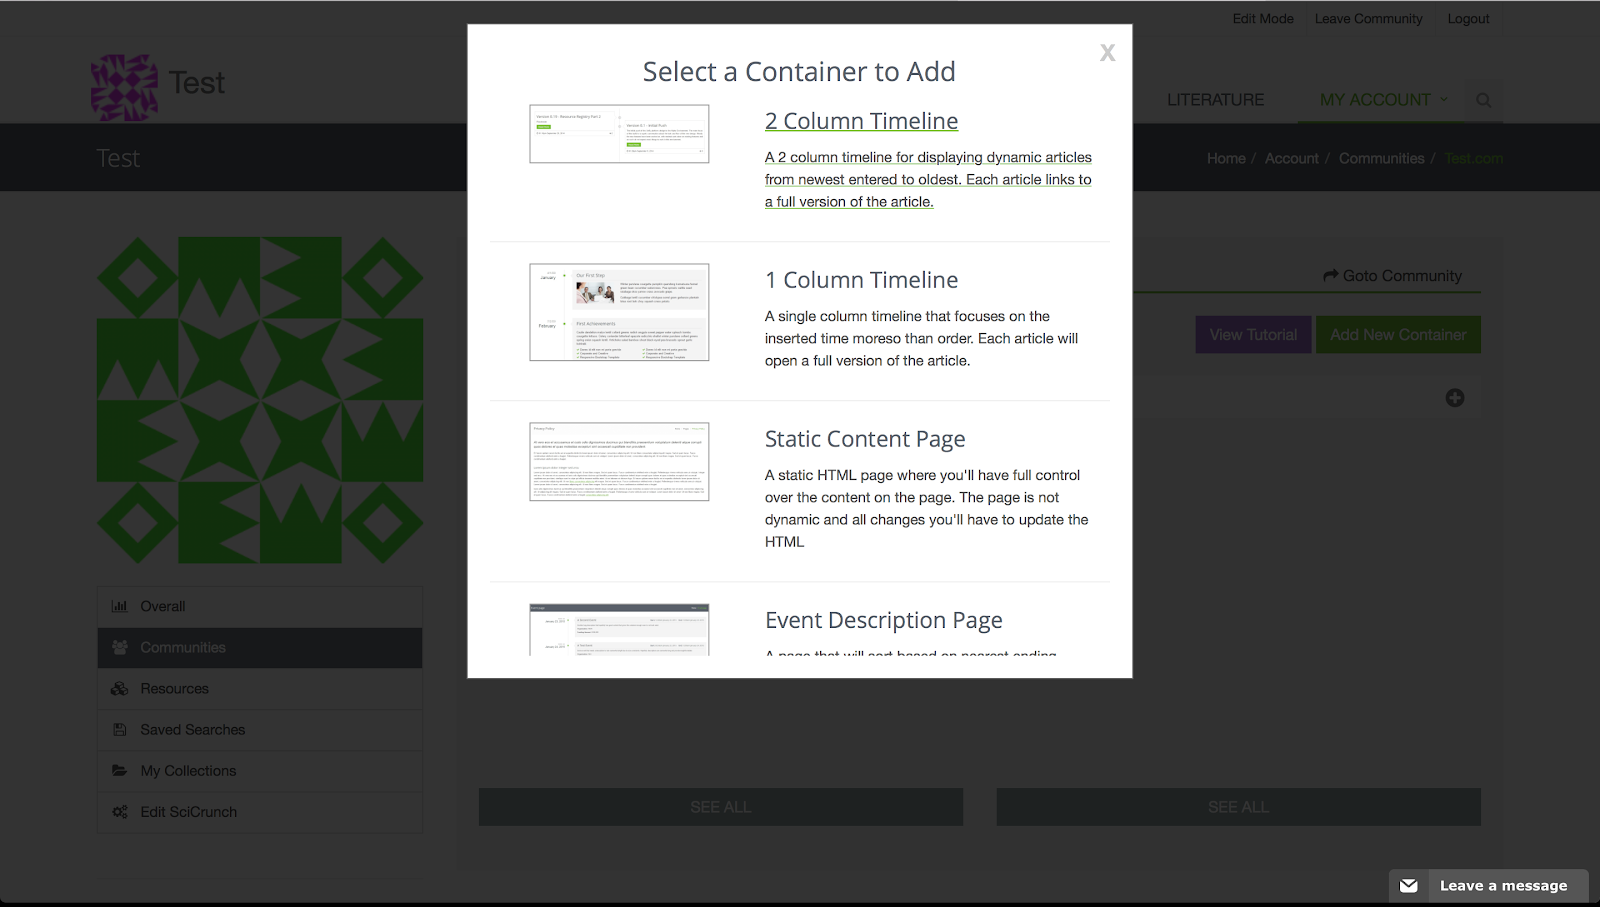
Step 5: The “Add New Container” browser will appear, this browser gives you numerous options for your communication needs, scroll through the options and find the best fit for the content you want to distribute.
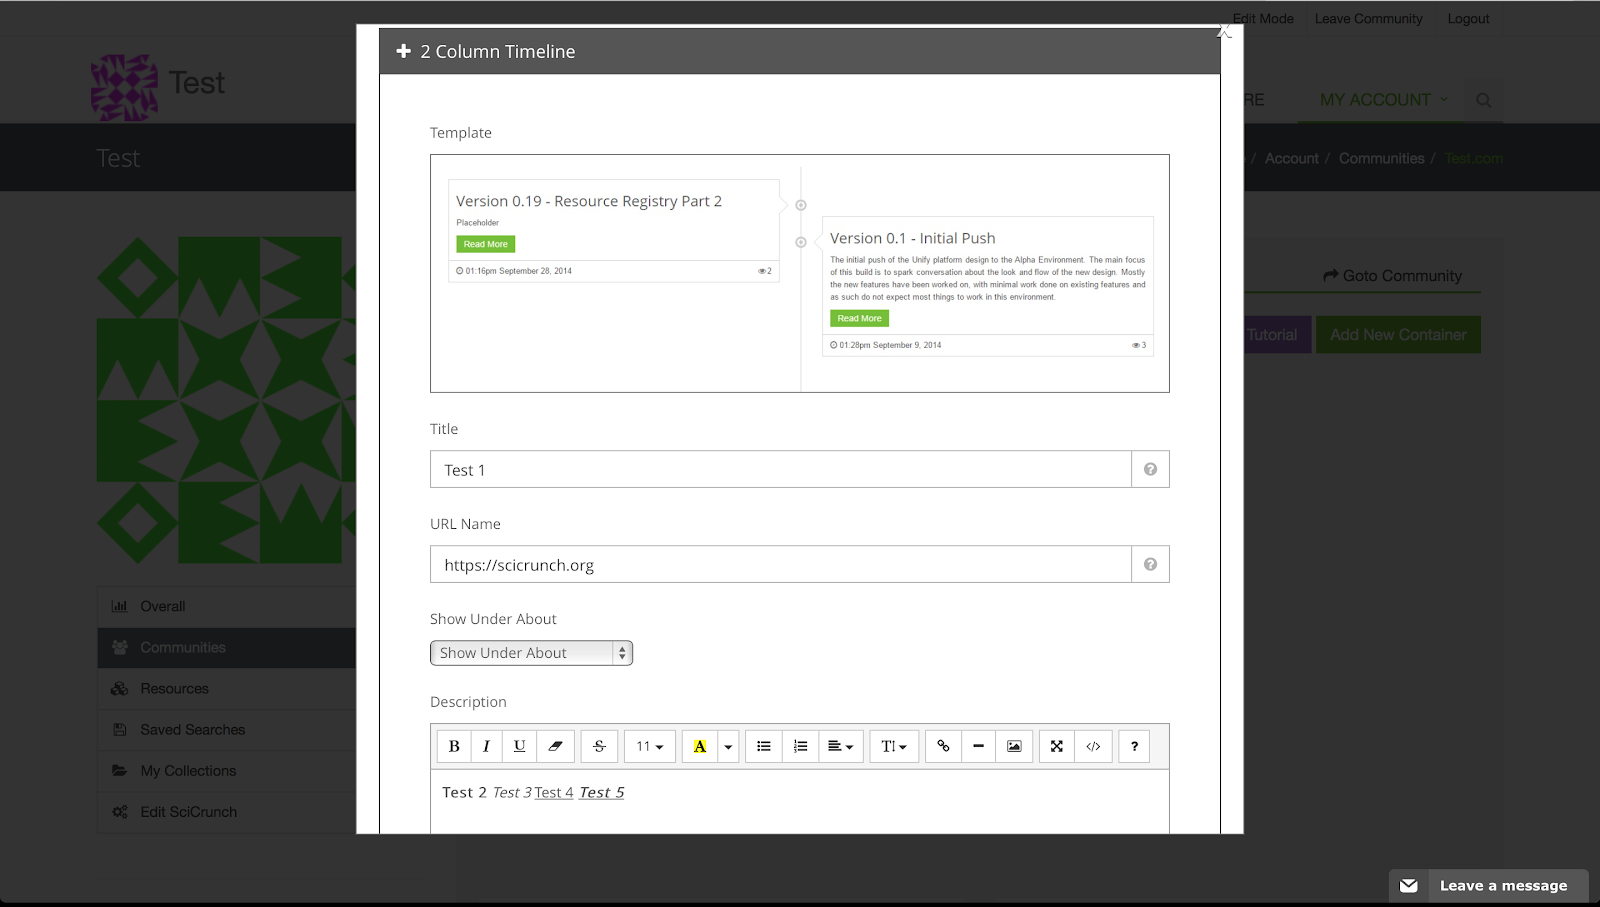
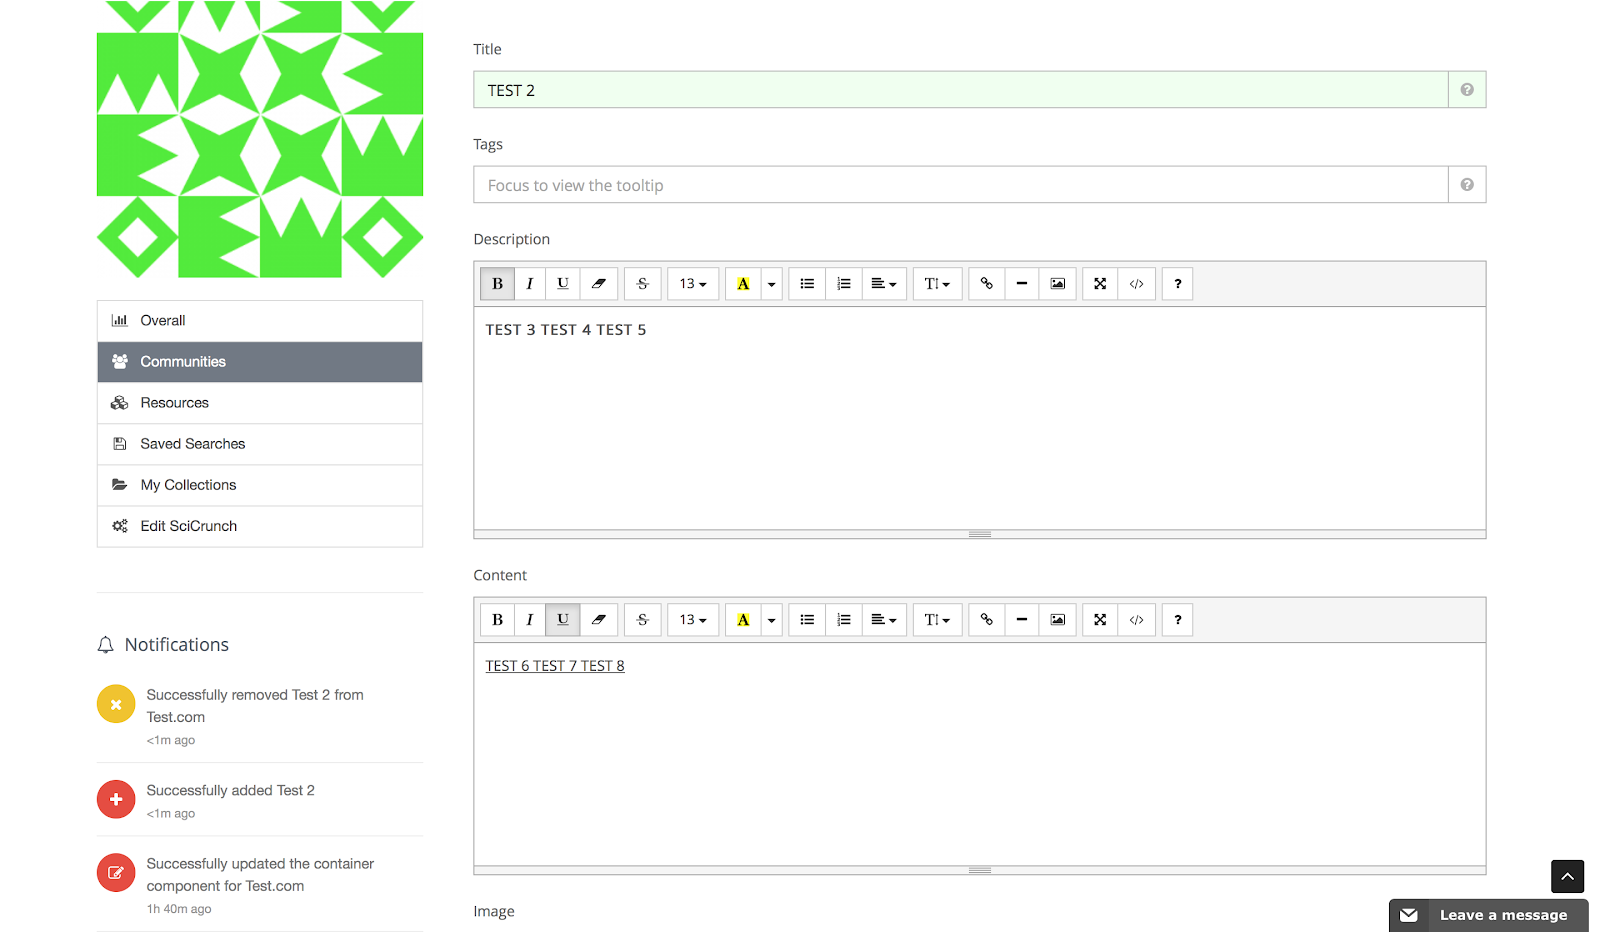
Step 6: Fill out the basic description of your content.
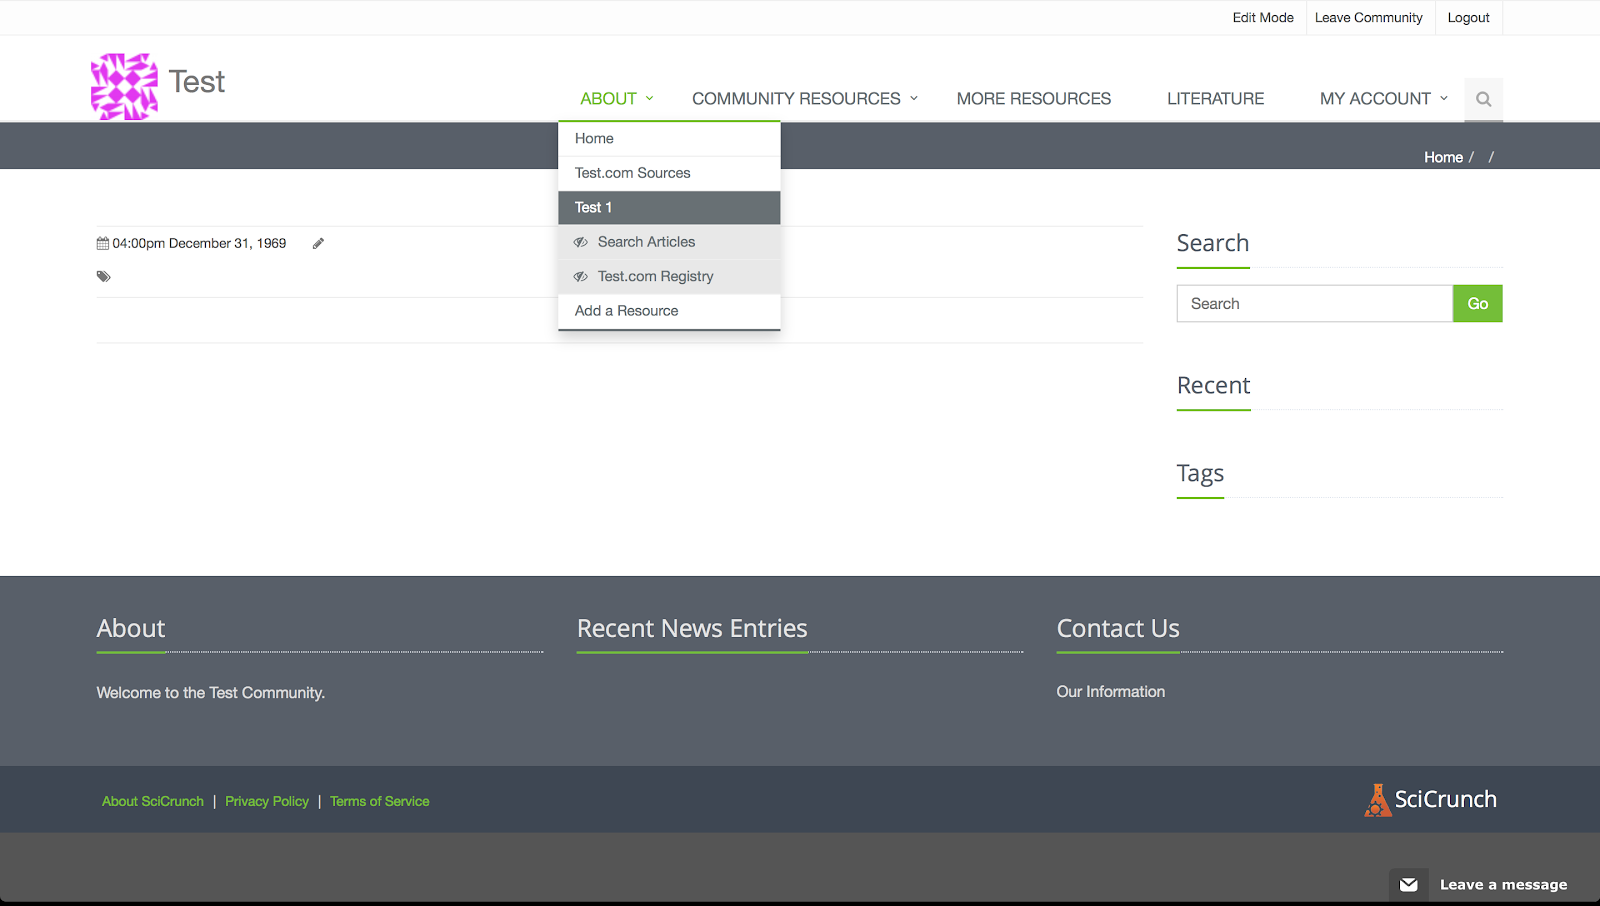
Step 7: After filling out your content, enter “Submit” at the bottom of the browser. Depending on the Container you created you will now be taken to a new page which is located under your “About” tab. Notice it essentially empty, not to fear, we will show you how to add your work to this new container.
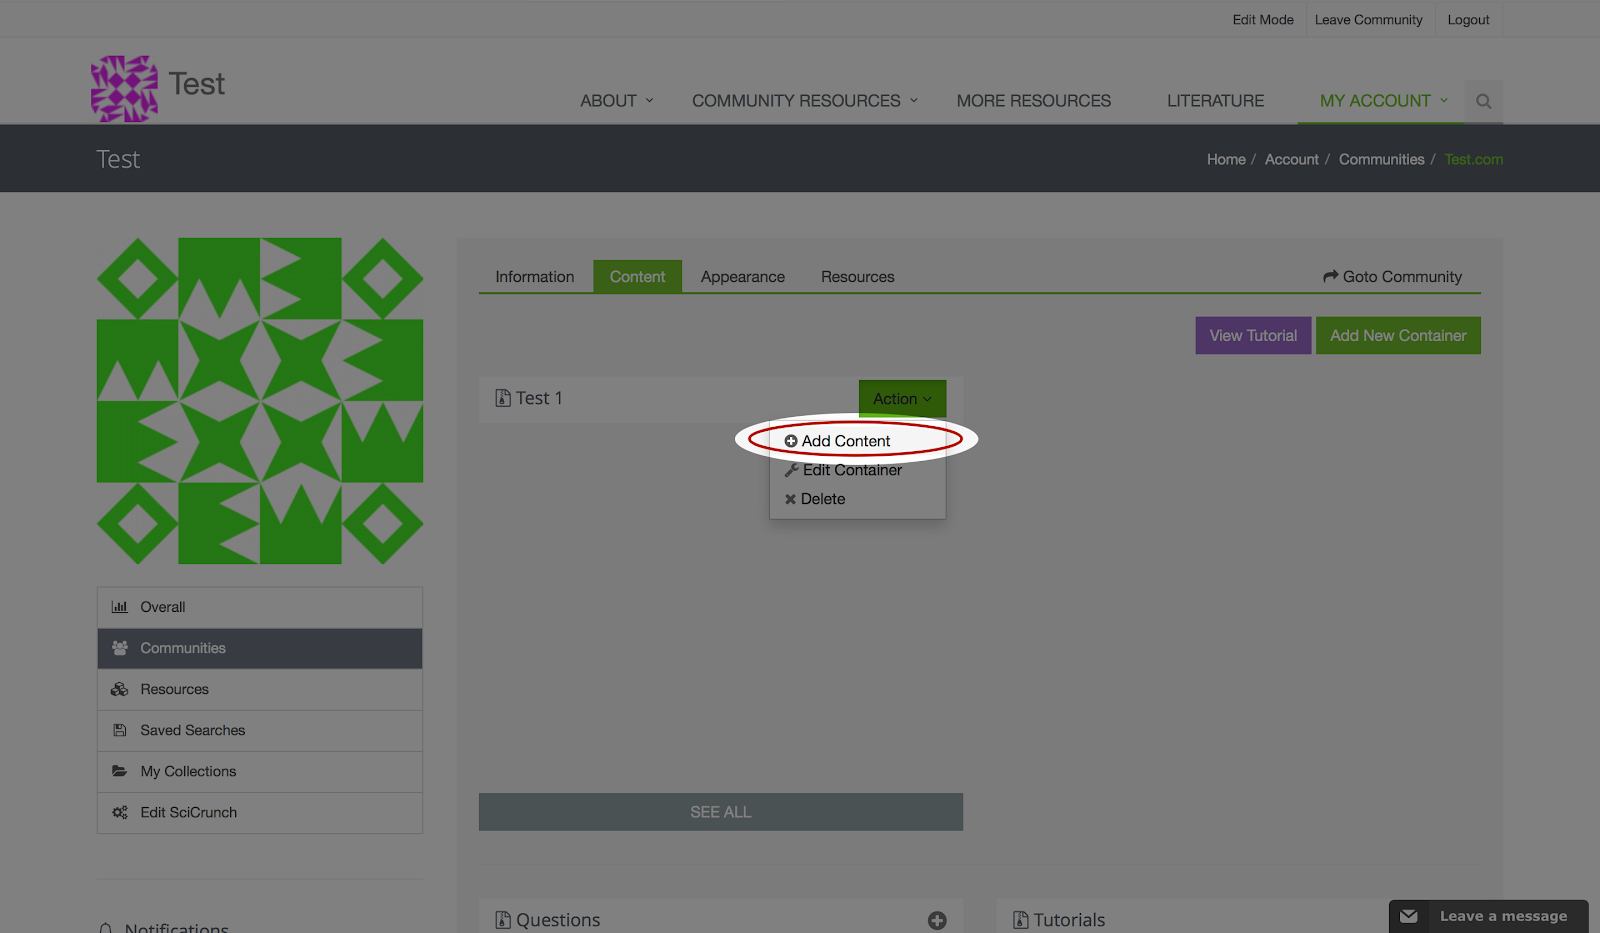
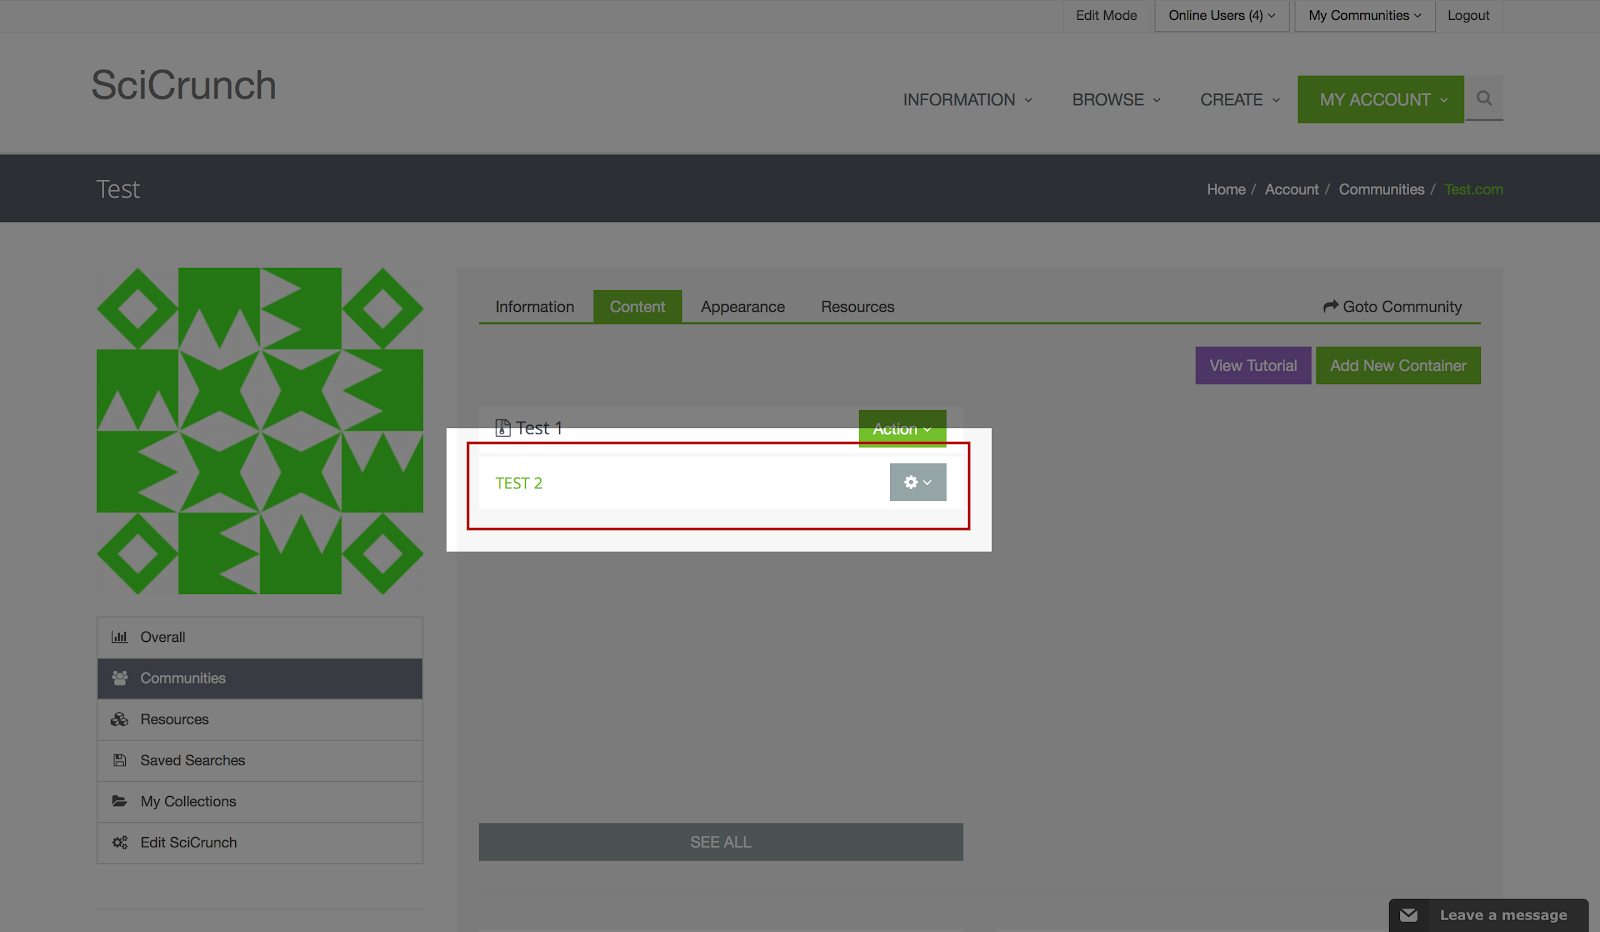
Step 8: Go back to the “Manage Community” page and return to the “Content” tab. You will find your new container there. Under the “Action” tab select “Add Content”.
Step 9: You can use this page to add content to your container.
Step 10: You now have a sub-tab to your container, with your content, this can be edited whenever you like by using the gear tab.
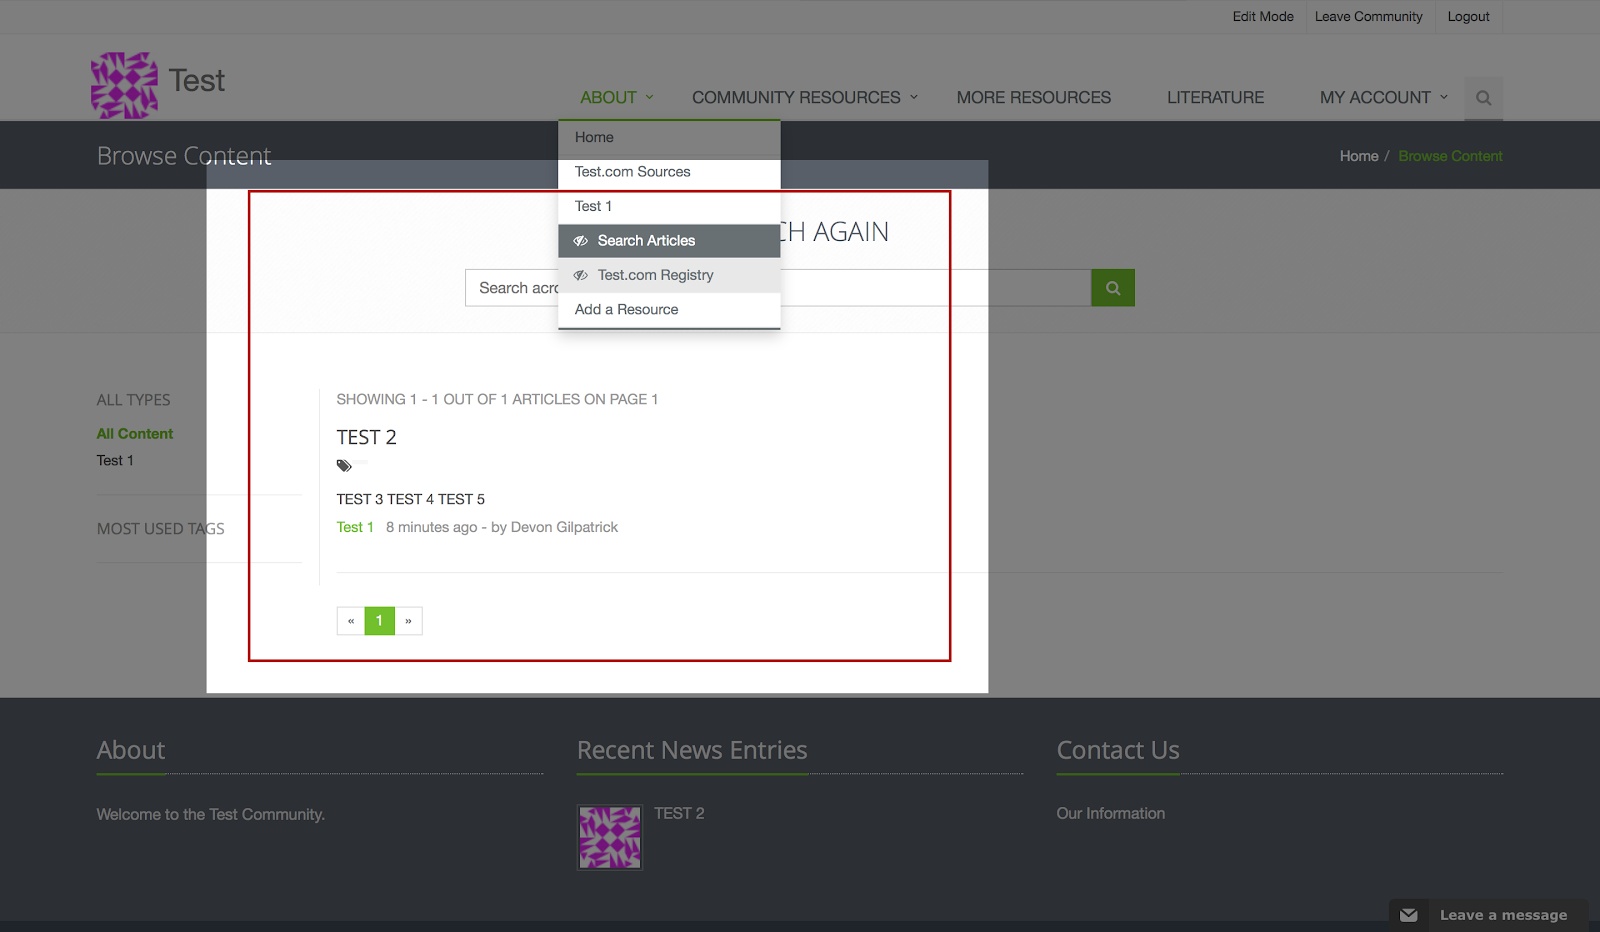
Step 11: You can now view your container and your content on your community page.
Search

Tutorials Tags
About
The SciCrunch Infrastructure was developed as a cooperative data platform to be used by diverse communities in making data more FAIR.


Contact Us
 scicrunch.org